Tampilkan postingan dengan label land rover restoration. Tampilkan semua postingan

Kamis, 20 Februari 2014

Blown Head Gaskets on Land Rover V8 Engines

I've got a blown head gasket in my Land Rover.  What will it take to fix it?  That's a question Land Rover service managers hear fairly regularly.  We used to do head gasket jobs all the time, but in the last 5-7 years many of those jobs went bad. Many shops won't even do LR valve jobs anymore.  Why?

This is a big issue for people with the original LR-Buick aluminum V8 engine - all the US market Defenders and Range Rovers to 2002 and Discovery I and II models through 2004.


The engines overheated and failed either right after the head gasket job, or within a few months.  At first I thought the failures were comebacks - errors of workmanship.  But I soon realized the problem was not the workmanship - it was the motors themselves.  They were failing internally, in seemingly invisible ways.

Join me now as we look closely at a seemingly simple head gasket failure, and find there is much more to the story . . . 

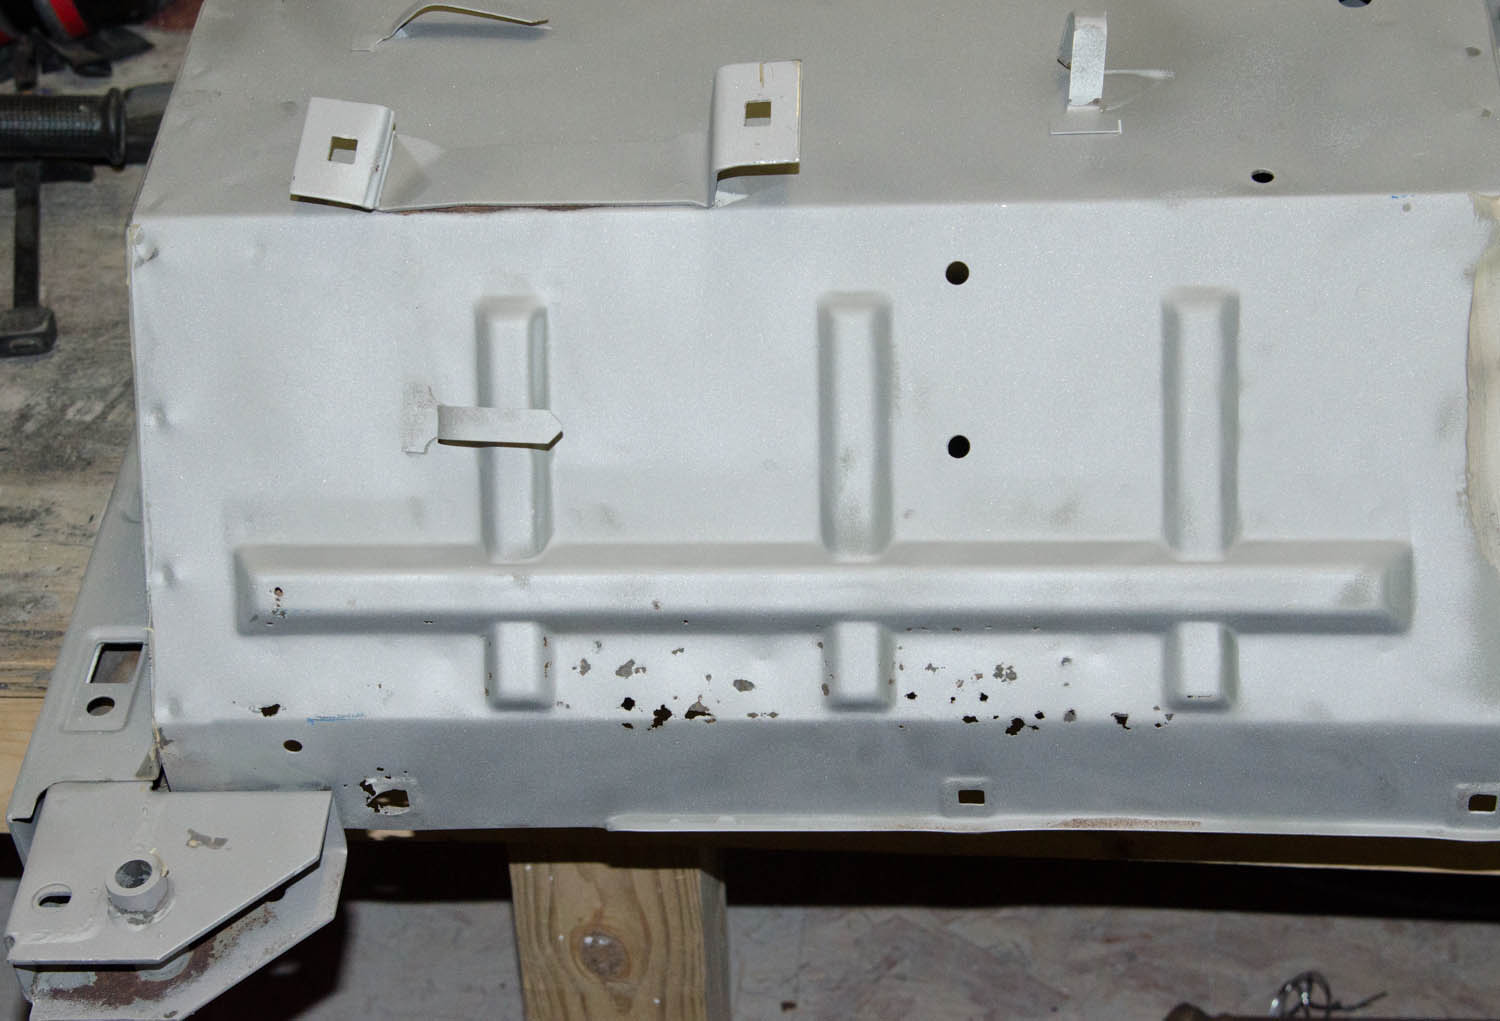
This 2001 truck came into Robison Service a few days ago (early 2014) with a noise complaint.  Exhaust gases were blowing out between the head and the block.  It seemed like a classic case of fire ring failure in the head gasket.  In years past, I'd have been right on it with new head gaskets and a cleaned up heads.  Today, not so quick . . . As it happens, our caution turned out to be well founded.

Here are both heads off the motor.  As clearly shown, only one has a blowout (second cylinder from the left, upper head)  So far, it looks like a blown gasket.


OK, now lets look at a closeup of the failed cylinder in that upper head.  The blowout line is in the center.  Look at the holes for the head bolts.  The one on the left is actually facing the front of the engine, as you are seeing the head upside down (we will look at that hole in the block in a minute)   Note how its orange from coolant intrusion.  The one on the right (the rear bolt hole) is clear and that’s what you want to see.

The orange is sedimented Dex-cool.  Sedimentation is a known issue with Dex cool and it's particularly visible here.  It looks very different from freshly spilled coolant, like you get from teardown.  Scroll down the page four more images and you'll see freshly spilled coolant in a head bolt hole.  There's no mistaking the difference.

There are some motors where the head bolt holes go into the coolant galleries.  This isn't one of them.  These holes should be dry.  The fact that they are not suggests a crack or leak somewhere.

The blowout has damaged the head slightly but it's nothing we can't fix with a weld and resurfacing before the valve job.  Right now, that is the least of our worries.


Like I said, that dried coolant is a bad sign.  There are no coolant passages from block to head in the middle cylinders of a Rover-Buick V8.  There is no connection between the head bolt holes and the coolant galleries in the block, either. That area should never show coolant.  It's a bad sign, suggestive of internal failure.  But there's more . . . 

Now lets look at the block on the right side.


The blowout is clearly visible in the bottom of the second cylinder back.  Note the rectangular marks at the left and right edges of the block.  Those are the passages through which coolant flows into and out of the head.  There is no coolant flow through the middle.

The reddish spotting between 1-2 and 3-4 cylinders and the respective lower head bolt holes is even more suggestive of slow coolant leakage.  We will look at that in closeups.  When you look at the second and fourth head bolt holes from the left, those are dark.  The other holes are light, meaning no long term coolant intrusion.

This is a closeup of the lower head bolt hole and the edges of cylinders 1-2 on that side.  Note the pattern of leakage from the liners in toward the head bolt hole. See the “burnt” coolant in the bolt hole.  Those are sings of long term seepage.  This usually indicates a crack emanating from the bolt hole out to the liner faces on 1-2.  Also note the pattern of leakage continues onto the surface of the front piston, which is washed clean of carbon in the same area.  This is a sign of coolant intrusion into the cylinder and its location corresponds to the seepage on the block


For comparison here are the front and rear head bolt holes with a view up to the coolant passages from block to head.  In the rear one you clearly see some coolant leaked in disassembly and the difference between that and what’s dried and hardened in those inner bolt holes in the earlier images  is clear


Here is a top view of the blown head gasket.   There's no damage (other than the blowout) between this gasket and the head.  It's very clean and normal looking.


Closeup of the bottom reveals a different story on the engine block side.  That face makes the leakage pattern strikingly clear, and shows it’s all coming out of the block.  That's not surprising, because it can't come from the head.  There's no coolant in that area!  However, the area between the head bolt bore and the cylinder edges is hollowed out in the casting, for coolant flow.  That is the area that is vulnerable to cracking, and that's what's cracked in this motor.


The leakage traces on the bottom side of the head gasket really tell the story.  The way the gasket is discolored we know the leak has been developing over a long period of time.  What happens is that the crack grows, and as it does, the crack opening relieves the tension on the head bolt. That's probably one of the reasons the fire ring seal blew out.


Here’s a broader view of the bottom of the gasket, where two leaks are visible, to the left and right of the blown fire ring..  

Like I said, five years ago I'd have put head gaskets on this motor and sent it down the road.  And looking at today's evidence - it would have failed because the block was already damaged.  Head gasket leakage was a symptom of that failure, not the actual problem.  It may have lasted a week; it may have lasted six months.  Either way, it would have blown.

Here's a photo of a stripped engine block, after we cut it in half and circled the crack that made it fail.  The coolant passages are clearly visible


What do we do now?

The correct fix will involve removal of the liners, welding the cracks, and then fitting liners with flanges at the top, so that the liners will seal agains the head basket and coolant will not be able to go between block and liner and cause a blowout.

Read more about that in this article from 2012.

As a footnote to this story, when told about these issues, the owner of the truck told me he'd been adding coolant for a while for a period of months.  Now we know where it was going.  The coolant was getting burned in the cylinders as it leaked from the cracks behind the liners.  The fire ring blew out because the block cracks caused the head bolts to lose their clamping force.  We have an explanation for the whole thing, disagreeable as it may be to the one who has to pay the bill.  Still, I contend it's better to know the bad news up front than to discover it after a $3,000 valve job and head repair goes bad.


John Elder Robison is the manager of J E Robison Service, independent Land Rover specialists in Springfield, MA.  Find him online at www.robisonservice.com or on the phone at 413-785-1665

Jumat, 14 Februari 2014

Restoring seats in collector cars from Europe

One of the issues to be aware of when buying "restored" cars is that the examples offered for sale were often restored with the resale market in mind.  To that end, those restorers tend to focus on the things you'll be able to see at an auction inspection.  More substantive things - such as would be revealed in a two-hour cruise - are often ignored or even deliberately glossed over.

Sellers will often take exception to my characterization, but the facts speak for themselves.  If it takes $50,000 or $100,000 to do a cosmetic restoration on a car, you can assume that a similarly thorough mechanical restoration (almost all of which will be invisible on superficial inspection) will cost at least as much again, maybe more.  Doing both will price the car well above the auction averages, which are based on superficial restorations.

You see that in "show winning" cars that have to be pushed off the field because they barely run.  You feel it in a "concours" car when you sit in the seat and it feels like you ass is on the floorboards.  That is the subject of today's essay.

Cosmetically restored seats look good but feel awful


You can't really tell if a seat is restored by looking at it.  You can see wear, obviously, and you can tell if the seat is crooked or mangled in some way.  But a seat can look perfect and still be totally worn out and uncomfortable.  How can this be?  It's simple.  People put new covers over worn out old seats all the time.  It takes far more time to redo the innards of a seat than to recover it, and the cover is what a buyer sees . . . 

Prior to the widespread adoption of foam seat pads in the late 1970s car seats were often made with a metal frame that held a steel box spring like you'd find in an old bed.  Those of you who remember vintage summer camp beds know that box springs wear out, and when they do, they just go flat when you sit on them.  

The steel box spring is often capped with burlap, which tends to crumble but is otherwise trouble free.  Above the burlap you will often find a Spanish moss or horsehair pad, and above that a felt pad and then the seat covering.  Those things provide the "look and feel" of the seat but the comfort will never be there if the box spring is collapsed.  When they get old, the burlap, horsehair, and moss also provide the brown furry dust that tends to rain down underneath vintage car seats.

Here's an example of the junk that falls out of old seats.  In this seat the box spring is so loose that the seat cover has fallen right out of the grooves in the base.


It's possible to remake metal box springs but it's getting harder and harder to find the materials.  Today, most restorers fortify those old steel springs with robust molded foam.  In these photos you can see us doing that very job on a seat from a 1964 Porsche 356.


We start by removing the seats, which is pretty easy on an old Porsche - they just slide out.  The top and bottom are separated, and the cover is removed from the base.  The frame and spring and "everything else" are in two piles on the bench.


This particular seat has good leather, and the felt and padding are pretty decent too.  We're going to tighten up the rod that forms the pleat across the middle of the seat, as shown below:

The rod

The pleat
Now we're going to trim the original padding where we'll be replacing it with foam.  We're going to install a two-inch thick dense foam pad which will largely take the place of the collapsed spring.  The spring will be compressed by the pad, which will sandwich it tightly, and the whole structure will be a lot firmer.


The pad makes the cover fit a lot more tightly, which reduces the chance it will fall apart on the car. Here's the assembled lower cushion.  On close examination, you can see it looks a bit more "full" than before we took it apart but to the average person it would look unchanged


In this car we are also installing period headrests.  Some of you will say "Porsche 356 didn't have headrests" but I offer this page from the 1965 workshop manual - which we still have in original print - which says otherwise and shows how to fit them.


Here they are, and here's the finished seat.  With the exception of the headrest I'm the first to admit it hardly looks any different.  But the difference when you sit on it is striking.


Doing over a pair of seats like this is a full day's work, maybe more.  But if you want to drive the car - as opposed to just look at it - it's time or money well spent.

The seats in 1950s to 1970s BMW, Rolls Royce, Mercedes or Jaguar are all made in a fashion similar to what's shown here, and can be taken apart and restored using similar techniques.  Sometimes you can buy precut foam.  Other times you have to cut your own with a hot knife.  Some times the inside of the cover will require repair, and that can be complex if the seat has a pattern.  The worst is when the frames have rusted because it's tricky welding sheet metal seat frames and breaks can be tough to repair.

John Elder Robison is the general manager of J E Robison Service Company, independent restoration and repair specialists in Springfield, Massachusetts.  John is a longtime technical consultant to the Porsche and Rolls Royce Owner's Clubs, and he’s owned and restored many of these fine vehicles.  Find him online at www.robisonservice.com or in the real world at 413-785-1665


Jumat, 17 Januari 2014

How to Buy Collector Car Insurance

What should you look for, when buying insurance for a collector car? Insurance is a complex thing; something many enthusiasts don’t come to understand until it’s too late – when they are unhappy or furious over their treatment when a claim is filed.


In my work managing insurance claims in a repair shop I see a few common problem areas. Figure these things out with your agent BEFORE buying a policy, and you will head off 99% of the worst potential problems.  The first is total loss value.  That’s what an insurance company will pay you if your car is wrecked beyond repair, burnt to a crisp, stolen or lost in the ocean.  It’s determined three ways, and it’s VITAL you understand which you have.

AGREED VALUE – this kind of coverage pays the value you agree upon.  Your premiums are typically xx dollars per thousand, so a $100,000 policy will cost twice what a $50,000 policy costs.  If you buy $50,000 of coverage, and your car becomes a total loss, that is what you will get.  If your car is damaged but not a total loss, they will repair it up to this limit.  Once repaired, your car will be covered by the agreed value limit once again. This is the only kind of coverage you want for most collector cars.

STATED VALUE – this sounds like agreed value, but it’s not.  Stated value will pay you the stated value, or the actual cash value, whichever is less.  Let’s say you buy $50,000 of stated value coverage, and you total the car.  The insurance company finds six similar cars offered for sale at prices ranging from $28-32,000.  Stated value coverage allows them to offer you $30,000 because that’s the average actual value as shown in the market.  The $50,000 you thought you had, isn’t.

Stated value is for all practical purposes the same as actual cash value, but they charge more for it. Stated value coverage benefits the insurance company, but it does not benefit the car collector.  I suggest you avoid this coverage.

ACTUAL CASH VALUE – this is the coverage most ordinary cars carry.  The insurance company sets the rate based on the average value of your car, and if the car becomes a total loss they pay the actual cash value at that time.  On a new Mercedes they might pay $80,000 (almost what it cost new) where the same car might fetch a $40,000 settlement a few years later as it had depreciated.  This coverage is usually fair and reasonable for modern cars, where replacements are easy to get and values are consistent.  It’s not very good for collector cars where value is often in the eye of the beholder.  Expect this coverage on your daily driver, but avoid it for your collector cars.


The next problem area is claims handling.  All policies spell these terms out, but few enthusiasts read the fine print.  Here are a few questions to ask:

What constitutes a total loss, and what about “loss of collector value?”  In many states the legislature of insurance commissioner has defined what constitutes a total loss.  In many states a total loss is a loss where the initial damage appraisal equals roughly 70% of the vehicle’s total loss value.  Depending on where you live, your insurer may or may not have control over this figure.  It’s good to know. 

In my state, as an example, a $100,000 car that suffers $60,000 damage will be fixed (not totaled), because that’s the law.  You may think it’s terrible and you may think your car’s collector value has been compromised, but in most cases there is nothing you can do.  So be aware.

Does your policy allow repair with new, original equipment parts?  Or does the policy say the first choice is used or aftermarket pieces?  Most people prefer the former; most policies provide the latter as the default.  Coverage may differ for glass and other parts in some states.  Deductibles can vary too.

Does your policy allow you to have anyone fix your car?  In some states your freedom of choice among licensed repair shops is a matter of law.  In other states shops are on some insurer’s approved lists but not others.  If you want the best shop in town fixing your baby, make sure the policy allows you to make that choice.


Does your policy pay prevailing rates for repair, or do they set an arbitrary limit?  Some places have a state-approved “standard rate” for auto body labor, which may work fine for repair of ordinary cars but prove unworkable for collector vehicles that require special skills.  If your car ends up at a shop that charges $69 per hour, and your insurer pays $38 an hour, you will probably have a problem. 

When dealing with collector cars you should ask if the comprehensive coverage includes rodent damage.  If mice eat your wiring or your upholstery will your policy cover that?  Rodent damage to upholstery can be extensive, especially on a collector car where new materials might have to be made to order at considerable cost.

Does your policy allow betterment, and if so, when and how much?  Betterment is the term for the part of a loss you (the insured) are responsible for because the repaired car ends up “better than before the loss.”  Here’s an example:  Let’s say you have an all wheel drive car that gets into a crash and the two tires on the right are damaged. The tires are half worn. Your insurance company say they are charging you 50% betterment because the tires were worn, and they have to fit new tires to fix the car.  Your tire dealer says you need to replace all four tires because you have an all wheel drive car, but the insurance company says they are only responsible for what’s damaged.

That is a normal thing in most places and with most policies.  Betterment may be set by the insurance commissioner in your state or it may be something you can choose in a policy.  Know what it may be, before you have to pay it.

If you understand the points above, and make good choices, you should end up with good coverage that you understand.  What about problems during the claims process?  Sadly, claims troubles are all too common, but they do not have to be.  At my company we’ve handled millions of dollars in claims and major problems are really rare.  But there are shops where every claim ends up as a fight.  What makes the difference?

That will be the subject of my next installment, so stay tuned


 John Elder Robison is the general manager of J E Robison Service Company, independent restoration and repair specialists in Springfield, Massachusetts.  John is a longtime technical consultant to the Rolls Royce Owner's Club and other car clubs, and he’s owned and restored many of these fine vehicles.  Find him online at www.robisonservice.com or in the real world at 413-785-1665

Senin, 02 Desember 2013

Land Rover electrics and the people who fix them

Land Rover electrics have come a long way since the first Range Rovers made their way to North America in 1987.  I was one of the first to be working on those rigs, and I marveled at what an improvement they were in civility and function from the Series trucks they (sort of) replaced.


Those first trucks didn't have anything you couldn't fix with a test light and a meter, but that changed pretty quickly.

By 1995 we had SRS (airbags), traction control, and electronic ride control.  Then we got the P38 Range Rover, and a whole new test system - the Testbook - based on an HP computer.

The successor to that series - the L322 Range Rover - came with CAN Bus technology, and a host of electronics from then-parent BMW.  That came with another test system - T4.


Then Ford took over, and brought us the IDS test system.

Now it's Tata and more complexity than anyone could have imagined, back in 1987.


We've seen four corporate owners, but Bosch technology has remained a constant.  As one of the top-ranked Bosch Car Service shops in North America we've built a reputation as the shop of last resort when Rover troubles seem insoluble.


Through all those changes one thing has stayed the same - it still breaks, and we fix it all!  That includes all the new stuff - iPhone integration, software updates, key programming, and more.

J E Robison Service
Springfield, MA, USA
413-785-1665
www.robisonservice.com


In our 27th year of providing independent Land Rover service.  Pickup and delivery, and long distance transport available.  Tune ups to show winning restorations.  Call or email John Robison - robison@robisonservice.com


Minggu, 14 Juli 2013

Land Rover Defender restorations at Robison Service


As we near the end of another extensive Defender restoration, I thought I’d take a moment to reflect on what makes a quality restoration, and what it takes to achieve that result.

Looking at the photo of the near-finished truck, it does not look very different from any other new Defender.  Except that this Defender is 19 years old!  And the fact is, with the work we did, it would not matter if the Land Rover we started with was 20, 30, or 40 years old.  The end result would look essentially the same, with the exception of period details.

You can go to any car show and see beautiful paint jobs.  But a paint job does not make a restoration.   Sometimes, all it makes is a mess.

When you paint a modern car, you are repairing damage on a vehicle that’s basically complete and serviceable.  So you can paint a scratch or repair a dent, blend the repair to the existing paint, and you’re fine. 

You can’t do that on an older vehicle like this.  In most cases, vehicles that are 20 years old have started to corrode on the seals and joints.  That’s usually where corrosion begins – there, and the places water is trapped under or inside.

A true restoration won’t hide corrosion.  It will remove it.  And a good restorer will take steps to reduce the chances of corrosion happening again, to the extent possible.

A proper restoration usually requires disassembly of the body.  Not just stripping the paint off – but actual disassembly.  On a job like this, we begin by taking the vehicle apart. We take photos every step of the way, and bag and tag the fasteners and hardware as we go.  Even when we use new hardware – often the case – having the original stuff tells us what sizes we need.


On a Defender we lift the body off the frame, and dismantle each section.  In this photo you can see the rolling chassis – rusted framing and all – in the process of teardown.  


A little while later, we begin the process of assembly – in this case, with a new galvanized frame.  We can use the old frames over – we can even galvanize them – but they are often weakened and building them back up will cost more than a brand new part.  Since the look is the same, we usually go new for this core component on 1990s trucks.  With an older vehicle we may go either way but a restored original frame will almost always end up costing a good bit more and that’s always a consideration.


As soon as the vehicle is apart we begin the process of stripping and overhauling the components.  This is a more extensive process than what we do when a vehicle comes in for component overhaul in our service department.  The difference:  In a restoration, we take everything apart, have the metal tank cleaned and blasted, and then we re-plate or powder coat every part before it goes back on.  The result is a subassembly that’s finished far better than it ever was new, and will hopefully outlast the original version as well.


The body sections are also broken into their component parts, and depending on the job, are liquid painted or powder painted after being cleaned up and repaired as needed.  On this truck we saved almost all the exterior sheet metal, though a good bit of repair was needed on some sections.


Disassembly and paint removal often reveals corrosion you never knew was there!

When the vehicle goes back together we replace or rebuild just about everything we handle under the car.  In many cases, we install upgraded or improved parts.  You can’t see this work unless you look close, but this kind of detail separates a paint job and cleanup from a true restoration.


Many of the parts we plate or powder coat were bare metal when these vehicles left the factory.  That may have been fine a few decades ago, but we cannot let them continue to corrode – in 20 more years there would be nothing left, and no replacement parts to be had.

Here are some examples, all of which are visible in the images of this truck
  • -       We replace the steel fuel lines with stainless
  • -       Rubber brake hoses are swapped for performance braid hoses
  • -       All bushings and joints are new, as are springs and shocks
  • -       Brakes are totally rebuilt with all wear items replaced
  • -       Exhaust is new, and assembled with non-corroding copper fasteners
  • -       Extensive use of stainless hardware to reduce corrosion on the body
  • -       Everything under the car is finished with the same care as the top


We often make subtle improvements.  For example, this vehicle has a custom Badger top.  You can buy cheaper tops from a catalog, but I have never seen a better piece of work than what we get from The Badger.  He’s slow and he’s finicky but if you want the best . . .


This Defender also has the Exmoor premium seating, which looks fairly original but is light-years better than what was supplied in this truck new.


The wheels are another area of change.  In America, these trucks came with allow wheels and BF Goodrich general purpose tires.  For this fellow’s use we installed military Michelin XZL tires on NATO steel wheels – which were also powder coated.  They are very different from original, but they are what armies use on these rigs all over the world, for good reason.

It’s no surprise that we installed a better stereo.  For a beach truck “better” means water resistant.  For that, we turn to marine radio and speaker components.  The original Rover stereo would be ruined in the first rain shower.  This system will shrug that off, and it has Bluetooth, ipod control, and a host of other features.

We’ve also swapped the non-secure wood console for a lockable steel Tuffy Box.  The vehicle is open all the time, and some secure storage is needed, even on a small island. 

A job like this will eat up at least 1,000 hours and require the skills of a number of different craftsmen.  This particular truck employed:
-       general Land Rover mechanics
-       two body men
-       a painter (liquid)
-       a powder coat specialist
-       several metal platers
-       a fabricator/welder
-       several upholstery men
-       a good detailer
-       a stereo/electronics installer

The list goes on . . . this kind of project is far from a one-man task.

We’ll be sending this truck to its summer home in a few more days.  Stay tuned for the finish photos and description . . .