Here is a pair of accumulators removed from the associated valve body. As you can see they unscrew in a counter clockwise direction. The left accumulator in the photo shows the threads where it installs to the valve body to the left, and the charge port is to the right.
The right accumulator shows the discharge plug screwed into place. When inserted, this plug safely discharged any residual pressure. This is an essential step in overhaul. The photo below shows a closeup of the plug and the charge port it screws into.
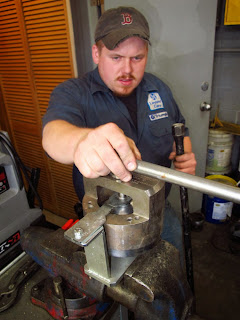
The accumulator is them clamped in a RR/B holding fixture and taken apart. This will require a big wrench as the torque is 275 ft/lbs. When it comes apart you have the two halves and the diaphragm in the middle. One side should be wet, the other dry.
If both sides are wet the diaphragm failed, which means the accumulator was totally failed. That's fairly uncommon.
Pick up the bottom half and you'll see a hole at the bottom. Inside find a circle, holding a washer, spring, and sealing ball. All those parts get replaced.
The next photo shows the diaphragm, which goes in between the two halves. The next step is to assemble and tighten the accumulator to 275 ft/lbs. In the photo below you see one tech holding the tool in position as another (out of picture) prepares to tighten it up
Once the accumulator is assembled it gets charged to 1,200 PSI with nitrogen. Here is an illustration of the charge setup. Note that everything needs to be secured for safety when actually charging.
Once the accumulators are charged the outer seal, o ring, cap, and safety label go into place.
You'll note the accumulator bodies in this story are all nice and clean. That's because we clean them and wire wheel away any corrosion before doing the job. We spray them in clear enamel to keep that look as long as possible. Note that the part number, the date of original fill, and sometimes the last five digits of the car's chassis number are usually engraved on the accumulator ring
And with that, they are ready to go back on the car. This job looks easy but you should expect to spent most of a day, doing it right. My photos show a spotless engine on a stand. The reality of a 40-year-old car and a ton of grease and filth may slow things considerably for you.
I've shown you how to do this job with the original Rolls-Royce service tools, which may not be available for purchase anymore. People who lack tools sometimes substitute an air chisel but that is hazardous and it damages the accumulator bodies. I urge great care in the charging process as the pressures involved make the pieces dangerous if they blow apart.
When you are done be sure to charge the system with the correct RR363 fluid. Other fluids - like Castrol LMA - don't have the castor oil lubricants needed by the pumps.
John Elder Robison is the general manager of J E Robison Service Company, celebrating 30 years of independent Rolls-Royce and Bentley restoration and repair specialists in Springfield, Massachusetts. John is a longtime technical consultant to the RROC and other car clubs, and he’s owned and restored many fine vehicles. Find him online at www.robisonservice.com or in the real world at 413-785-1665
Reading this article will make you smarter, especially when it comes to car stuff. So it's good for you. But don't take that too far - printing and eating it will probably make you sick.


Tidak ada komentar:
Posting Komentar